Wednesday, 20 November 2013

Routine Maintenance

In this post, i will be showing you how to conduct routine maintenance, including Disk Cleanup - a program to improve the overall performance of your PC; Disk Defragmentation - a program which rearranges the fragmented files on your hard drive to their correct place, so that the computer can run at optimum speeds; Physical routine tasks - such as cleaning the keyboard.

Disk Cleanup:
First, you must open up the start menu, and click on Disk Cleanup.
Next, you must let it analyse your pc.
Now tick/untick which parts of your pc that you want the Disk Cleaup to work on, then click ok.
Then simply wait for the program to run its course, and, when complete, your pc will be run faster/ will perform better.
Disk Defragmenter:
To start the disk defragmenter, click start> all programs> accessories> system tools> Disk Defragmenter
Next, click on the drive that you wish to defragment, and click analyse.
When the file has been analysed, it will give you a menu to show you how fragmented your drive is currently, and how the drive will be after defragmentation.
Now, click defragment, this will start the process of defragmentation and rearranging your files.
When the process is finished, a popup will appear, to tell you of the defragmentation success, where you can either simply close it or view the files which have been rearranged and to where.
If you chose to view the files, then this screen will pop up, showing you the files which have been rearranged.
Physical Routine Maintenance:
These wipes are just one of many tools which are used for physical maintenance, other than just cleaning the exterior of your computer, you can also dismantle parts of it to properly clean it.


Use said wipes to clean the keyboard properly, so that it is kept clean and hygenic, this is especially good practice when there are several people using the computer, as it reduces the spread of germs/ infection.


Friday, 15 November 2013

Configuring the System

This post will be showing you step by a step process of how to create a new User Account, changing the mouse settings, changing the background image and creating shortcuts.


User Account:
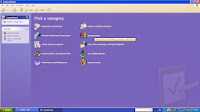
1. To create a new user account, go to start, then click on control panel.

2. Next, choose a name for the new account.


3. Now, you must choose whether you want the new account to be a normal user, or an administrator class account.
Mouse Settings:
1. Now, to change the mouse options, go to control panel, then go to printers and other hardware.
2. If you are left handed, then you will click on the mouse option, and change the button configuration to left-handed on the right half of the menu, and then you can change the mouse sensitivity aswell.
3. If you are right handed, then you will click on the mouse option, and change the button configuration to right handed on the left half of the menu, and then you can change the mouse sensitivity aswell.
Background Image:
1. Now, to change the desktop background, right click the mouse whilst on the desktop, then click on properties.
2. Next, you can change the desktop image to whatever you like from the list of options, and then click apply and it will change the image onscreen to the image of your choice.

Create a Shortcut:
1. Now, to create a shortcut, right click a file or program, and then click create shortcut - you have now created a shortcut to the file or program of your choice.

Thursday, 14 November 2013

Building a PC

Building a PC


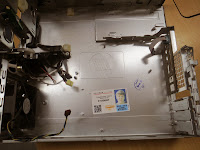
First, i started with an empty PC case, into which all components of the computer would be fitted. This case also serves to protect and secure all the internal computer components from some physical damage, such as if you were to drop it, less components would be damaged than if they were all loose and separate.


Then i placed the fan into place and screwed it into place. This is one of the most essential parts of the computer, as it keeps all components cool and operating properly, lest they overheat and break/ corrupt.


I then inserted the motherboard, with the external plugs facing out the system unit, and fastened it into place with the green screw. The motherboard is the most vital part of the system, as it controls all operations and components of the computer system.


Next i inserted the graphics card into the motherboard, with the graphics card fan facing out of the unit. This is the component of the keyboard which allows all data to be projected onto the monitor in the form of text and images.


Then i slotted the two RAM cards into the special slots on the motherboard. These allow the computer to run all operations and software, the more RAM the computer has, the faster it will run and load software.


I then slotted the hard drive into place on the system unit. The hard drive allows you to store all software and applications on the system. These come in various sizes, the bigger your hard drive, the more files and software you can install on the computer.


Hard drive in place on the unit.


Then i inserted the main fan into the system unit, and connected all the wiring to the motherboard and components. If this fan were not installed on the computer, then the internal components would overheat and corrupt or break, which are expensive to replace.


Lastly i fitted the DVD drive into the system unit, and connected it to the motherboard. With this DVD drive, you can both view/ watch DVDs, use DVDs for external backups, and also burn/write data to DVDs.


After i had put the cover on the system unit, i connected it to a monitor and a keyboard ready for the first boot up and set up.